 Online Contact
 Send Message
Horse Bedding Pellets: Less Dust, High Absorption, Low Cost
Loose straw and sawdust often absorb poorly. They create more dust and need to be replaced often. Bedding pellets made in factories use pressure and heat to improve performance. These pellets offer steady absorption, control odors, and reduce dust. This keeps stalls clean and dry while cutting daily costs.

Recommended Materials for Bedding
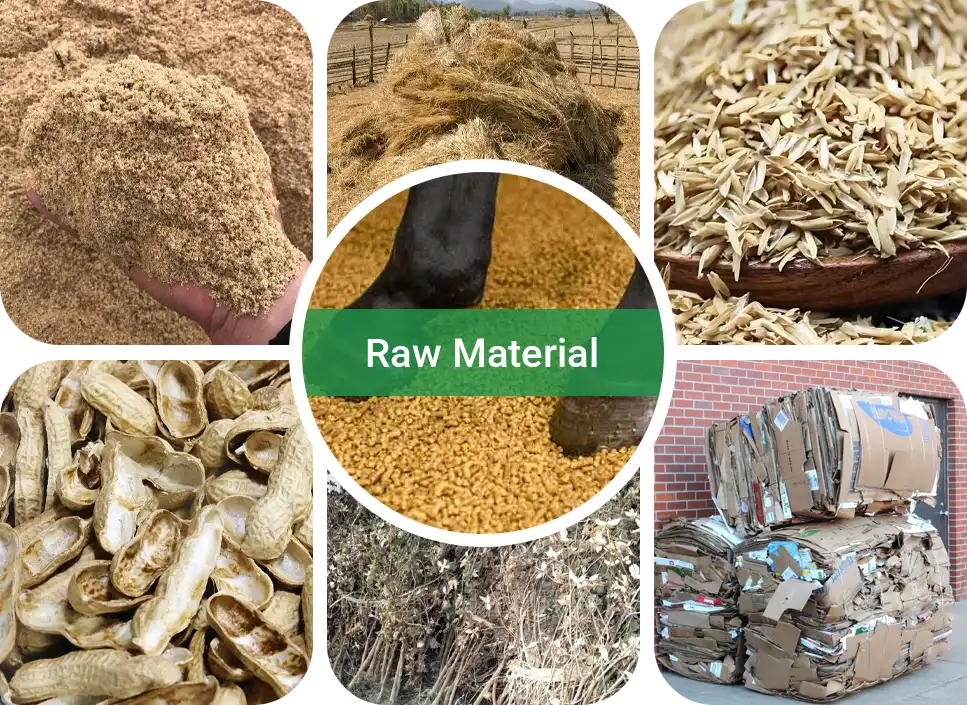
Choosing the right material is the key step in making quality bedding. With the right mix, you'll get pellets that absorb well, are easy to spread, and make the most of what's already on your farm. Here are some common and suitable options:
- Sawdust: Great at soaking up moisture. (1 kg can absorb up to 3 kg of urine)
- Straw (corn, wheat, etc.): Crush first. Mix with sawdust for better pellet formation.
- Rice husks: Light and loose. Helps keep pellets fluffy when mixed in.
- Peanut shells: Light and breathable, helps keep bedding dry.
- Cotton stalks: Makes firm pellets, good for floors. Must be finely crushed.
- Waste paper / cardboard: Absorbs well. Old boxes and shredded paperwork fine.
Dry the materials first, but keep them slightly moist-easy to form a ball by hand, but it should fall apart when released. This helps make solid pellets. You can mix different materials, like sawdust with straw or rice husks, to improve shaping and reduce costs.
Before use, check the materials and remove any visible debris, plastic, or mold. This keeps the bedding clean and safe for your horse.
How To Make Bedding Pellets
You may think making bedding is complicated. But with a few key steps, it's actually quite simple. Here's a practical guide to help you get started easily.
Basic Tools Needed
You don't need large machines. These basic tools are enough for daily use:
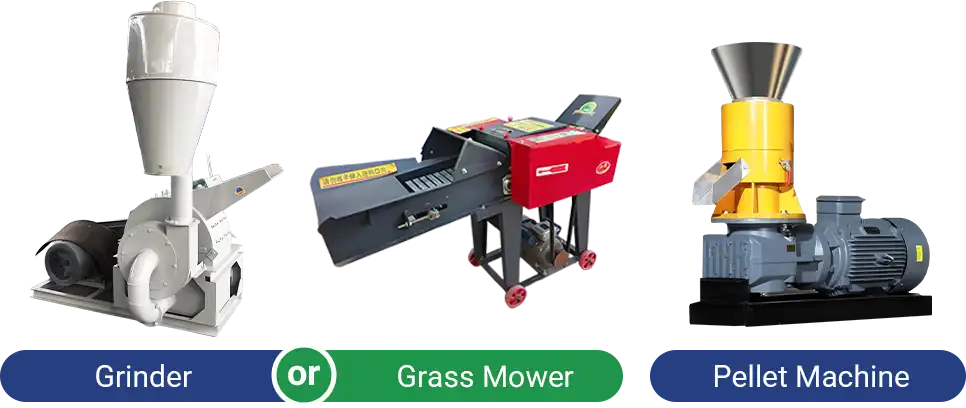
| Tool / Equipment | Use |
| Crusher / cutter | Breaks materials into small pieces |
| Pellet mill | Making bedding pellets |
| Bucket / sprayer | Adjusts moisture |
| Gloves / shovel / bin | For feeding and collecting safely |
| Drying mat / sieve (optional) | Dries or filters materials |
Processing Steps
Before starting, spread out the materials to dry or air out. If possible, do a simple sterilization. The process is straightforward, just follow these steps:
- Pre-Treat the Materials
Spread straw, rice husks, or sawdust in a ventilated area to dry. This helps prevent mold and keeps some moisture for binding. Stalks thicker or longer than 10 cm should be cut into smaller pieces. Long materials can clog the pellet machine and waste time and power during crushing.
- Fine Crushing
After cutting, crush the materials into 3–5 mm pieces using a hammer or disc mill. Too large is hard to press, too fine wastes energy. Sift the crushed material to remove stones, nails, plastic, and excess dust. This protects the die and reduces pellet breakage.
- Mixing and Moisture Control
Using only one material can cause loose pellets. A 60:40 mix of sawdust and straw gives better results. Ideal moisture is 12–15%-squeeze the mix, it should clump but fall apart easily. If too dry, spray a little water and mix well. Add no more than 1% water each time to avoid clumping.
- Pelletizing
Run the machine empty for 1–2 minutes to preheat. This helps with smoother forming. Start feeding slowly-keep each batch below one-third of the hopper height to avoid clogging or overload. If pellets crack or come out uneven, adjust the pressure or slow down feeding.
- Cooling and Use
Fresh pellets can reach up to 60 °C. Bagging them right away may cause moisture buildup and clumping. It's best to spread them out in a shaded area to cool naturally below room temperature. Once cool, store in a dry, ventilated place.
When using, lay a 2–3 cm base layer of coarse pellets or wood chips, then cover with 5 cm of softer pellets. This setup absorbs urine quickly, cushions the hooves, and makes daily cleaning easier.
Ready to try but missing a machine? We offer high-quality pellet machines for sale. Feel free to contact us anytime.
For Bigger Bedding Needs
For large horse farms managing dozens or even hundreds of horses, a single pellet machine is often not enough. In this case, setting up a complete pellet bedding production line can greatly increase output, reduce labor, and ensure consistent quality.
A typical pellet bedding production line includes:
| Part | What It Does |
| Crusher | Breaks raw materials into fine particles |
| Mixer & Conveyor | Mix and move materials evenly |
| Moisture Control | Keeps moisture at the right level |
| Pellet Mill | Presses materials into bedding pellets |
| Cooler & Screener | Cools and separates usable pellets |
| Packaging | Packs of pellets for storage or delivery |
The production line can be customized to fit your needs. It's ideal for horse farms, bedding suppliers, or co-ops with long-term bedding demand.

We provide full support, including equipment selection, layout design, installation, and training. Get in touch for details!
Daily Maintenance and Replacement Tips
After the bedding is in use, the key is to check often, replace early, and avoid waste.
Check the stall every morning and evening. Use a fork to gently turn the top layer. If the pellets are still loose and light-colored, they're working fine. If you see dark clumps or smell of ammonia, remove that area and add fresh bedding. Check the floor moisture too. If slightly damp, sprinkle some dry pellets before deciding on a full refill.
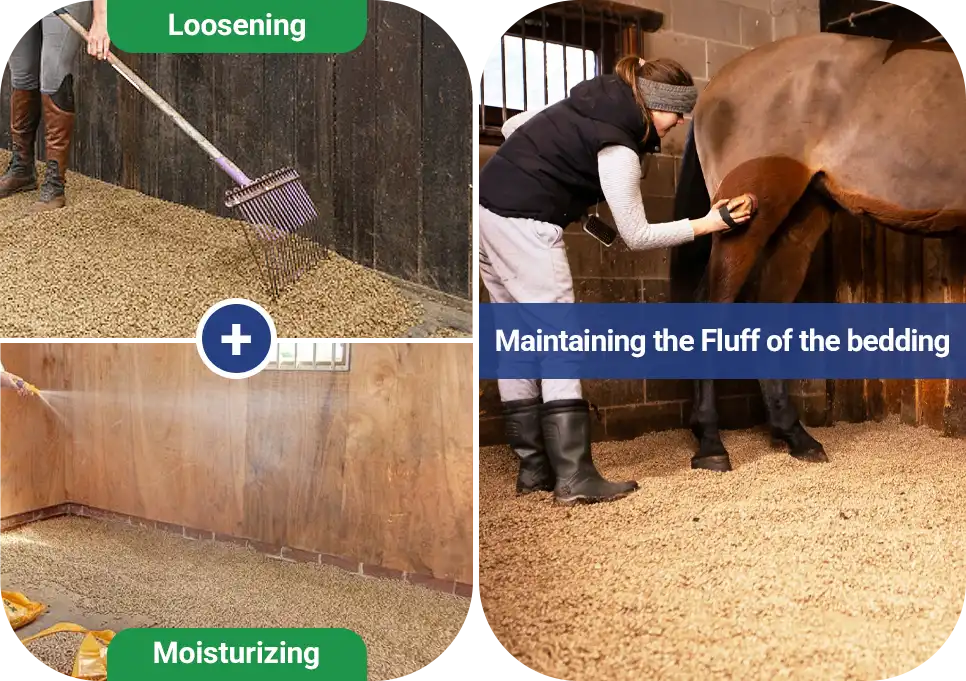
Fluffing and Moistening
To keep bedding soft, fluff the top layer every 2–3 days. This improves airflow, controls bacteria, and prevents hard spots. After fluffing, spray a little water on dry areas to help the pellets absorb again.
When to Replace
There's no fixed rule. For one horse in a well-ventilated stall, bedding can last 2–3 months. In damp or busy conditions, replace every 6–8 weeks.
If you smell ammonia, see soggy areas, or the pellets lose bounce, it's time to change all. Used horse pellet bedding can go straight to compost. Mix with manure, let it sit, and it becomes rich fertilizer in a few weeks.

FAQ
Why not make horse bedding pellets yourself?
It takes high-precision equipment to control moisture, dust, and quality. Plus, the cost of machines, energy, and labor is usually higher than just buying ready-made pellets.
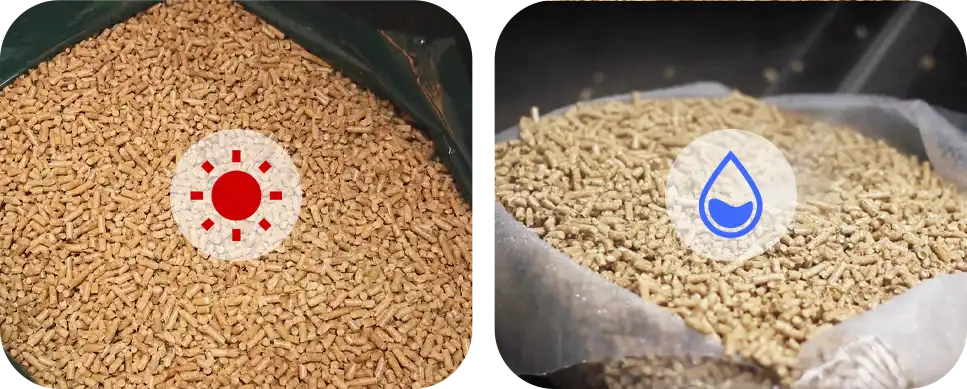
What's the difference between dry and wet bedding?
Dry bedding is simple. Spread pellets to the needed thickness. It uses more material at first and may feel firm underfoot.
Wet bedding starts with a thin layer, about one-third of the dry method. Spray water and mix as you spread to let the pellets expand. It takes more time but uses less material and feels softer.
Any tips for odor control?
Add 1–2% pine sawdust or a small amount of activated charcoal when mixing. This helps reduce the ammonia smell. Also, clean wet spots regularly and keep the area well-ventilated.
Need Some Help?
Contact us quickly and we will reply you within 24 hours. We will not disclose your information.