 Online Contact
 Send Message
Wood Crusher Machine Operating Instructions
File Download
Get the full operation manual in PDF format.
I.Overview
This wood crusher is designed for cutting and crushing wood materials such as branches, wood strips, and wood scraps. It processes long materials into shavings or sawdust for easier collection, transport, and storage.
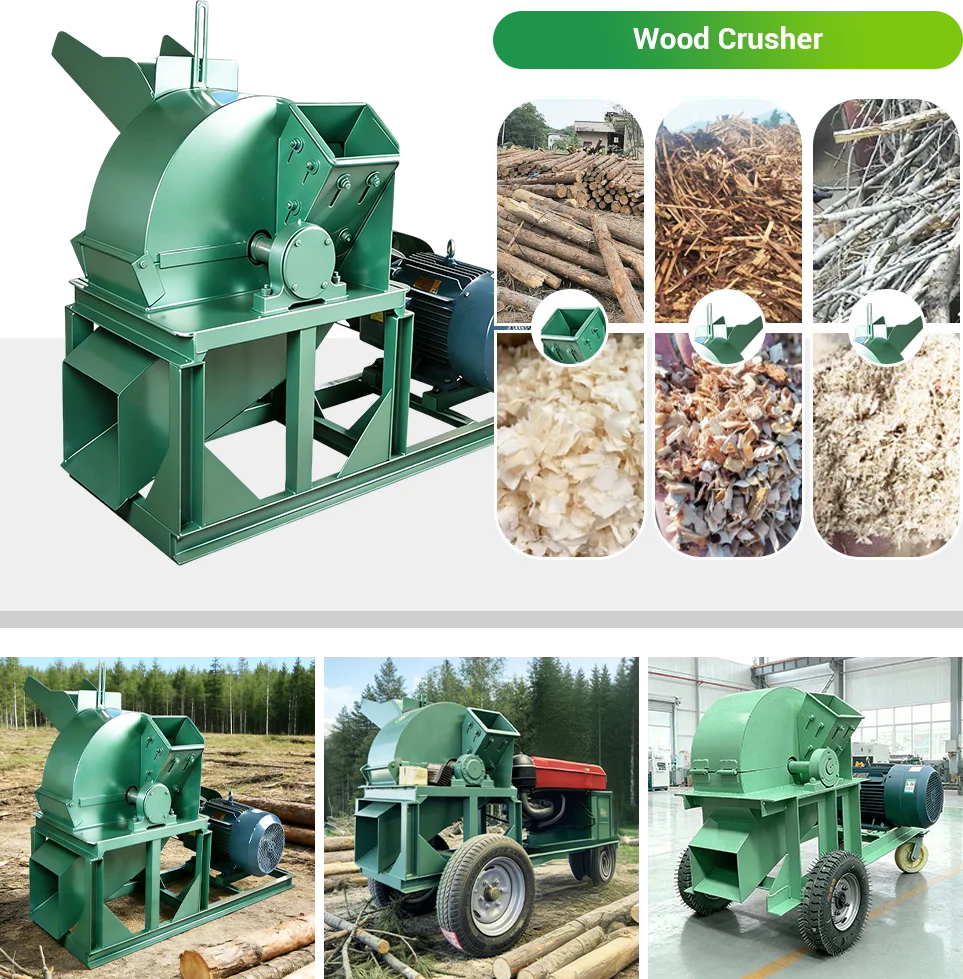
For safe and stable operation, please read and follow the instructions in this manual.
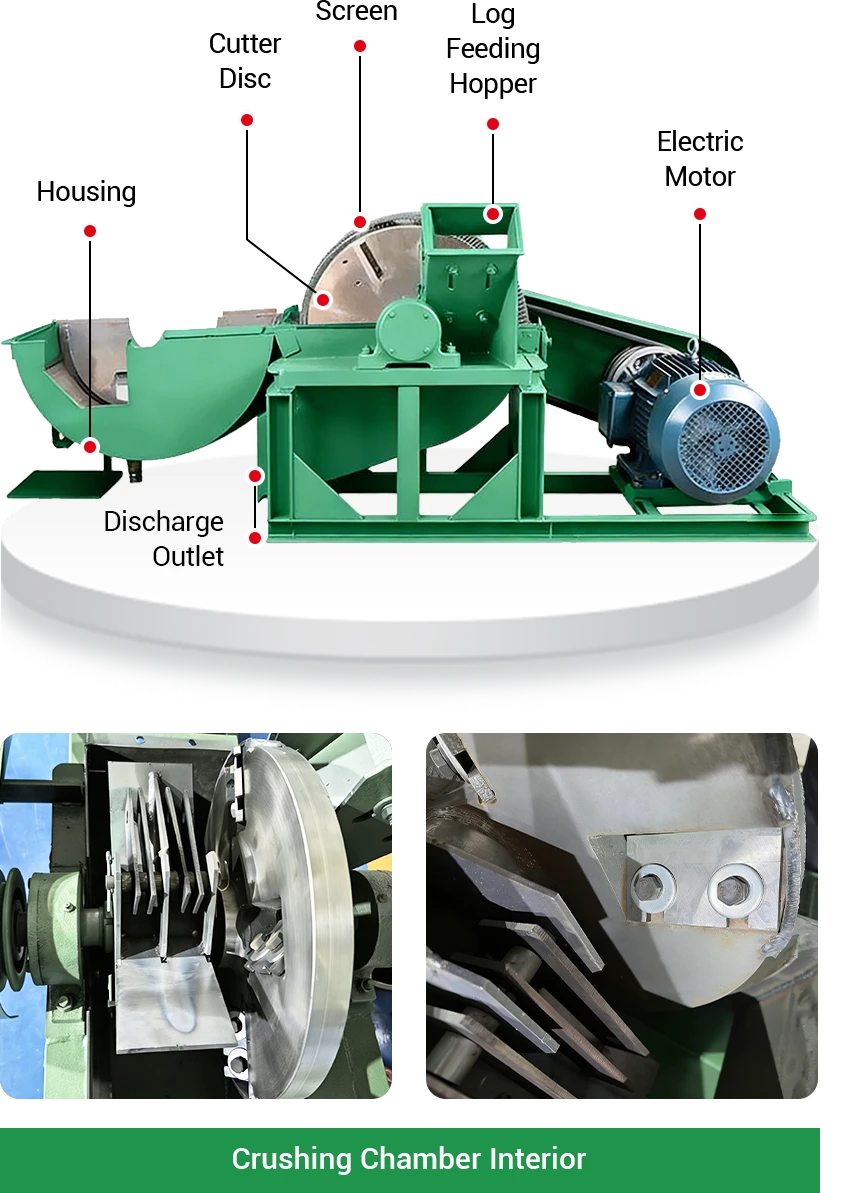
II.Equipment components
III.Standard Operation for First Use
1. Power Connection and Startup Guidelines
Electric Motor Model
Wiring of electric motor model shall be completed by users after arrival. Before wiring, confirm that local voltage and phase number conform to equipment requirements, and have the wiring done by professional electricians. After wiring, perform inching test run first, and put into normal use after confirming correct rotating direction.
Diesel Engine Model
Diesel engine models are available in manual start and electric start types. Before starting, check the engine oil, diesel fuel, cooling water and all connecting parts for normal condition. Operation procedures vary by starting mode, please refer to corresponding instructions according to your equipment configuration.
2. Correct Rotation Direction Inspection
Perform no-load trial run before first use to check if the rotation direction is consistent with the arrow mark on the machine body.Normal feeding is allowed only after confirming correct rotation, stable operation and no abnormal noise or vibration.
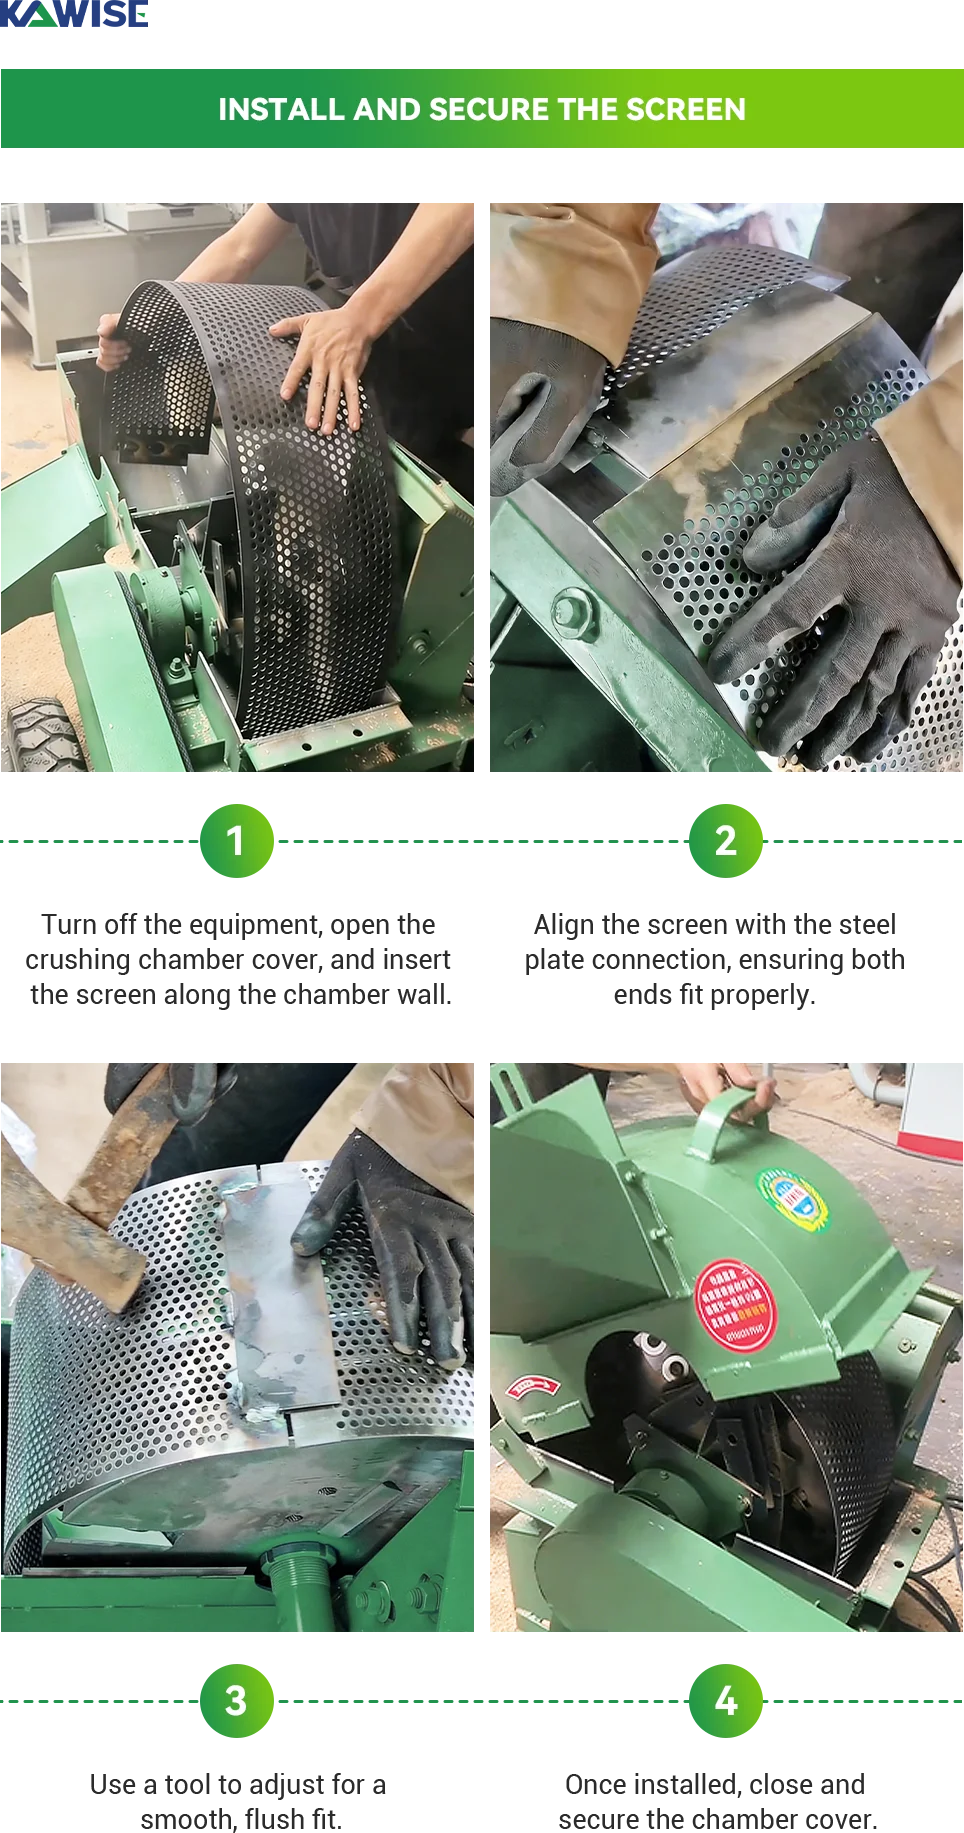
3. Install screen mesh / feed inlet
Screen Installation Steps
- Cut off the power or shut down the diesel engine and ensure the machine stops completely before operation.
- Open the outer cover of the crushing chamber and clear residual wood chips and debris inside.
- Put the screen into the crushing chamber along the arc to fit the inner wall tightly.
- Adjust the screen to align the steel plate joints at both ends.
- Fasten the steel plates at both ends tightly, make sure no dislocation, warping or looseness.
- Check the screen is fully attached to the inner wall to avoid friction with blades.
- Close the outer cover and tighten the fixing bolts, ensure no foreign objects left inside.
- Conduct no-load test run after installation. Start feeding only if no abnormal friction, vibration or collision noise occurs.
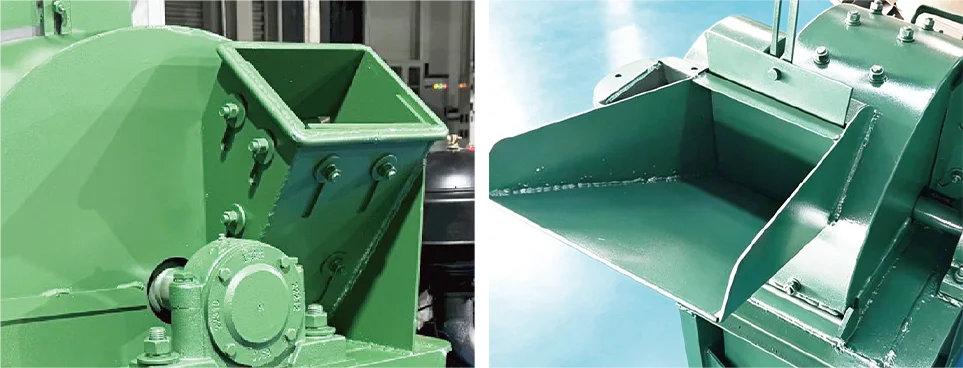
Feed Inlet Installation Steps
- Distinguish the two feed inlets according to the machine structure.
- Align the feed inlet with the connecting position and bolt holes of the main unit.
- Slightly fasten the bolts first, then tighten them one by one after confirming correct installation direction.
- Check the joint between feed inlet and main unit, no obvious gaps or shaking allowed.
- Ensure no tools, screws or other foreign objects remain inside after installation.
4. Install Cyclone Dust Collector (Optional)
- Place the cyclone bracket on flat ground and fix its base to prevent shaking after installation.
- Mount the cyclone cylinder on the bracket with the conical discharge port downward and side air inlet facing the discharge direction of wood crusher.
- Connect crusher discharge port to cyclone side air inlet. Align pipe joints and fasten tightly with clamps or bolts to avoid air and material leakage.
- Fit collecting bag under the conical outlet and fasten the bag mouth firmly to prevent wood chip leakage.
- If equipped, install dust filter bag on top air outlet and fix securely to avoid falling off and dust overflow.
- Check all pipes, joints and bags for firm installation. Keep pipes unbent, unblocked and correctly connected.
- Run the machine idle after installation to check for air leakage, material leakage and shaking. Start trial feeding only after smooth discharging is confirmed.
.webp)
5. Operation Process for Log and Branch Crushing
Use the small feed inlet when crushing long materials such as logs, branches and wooden sticks.

- Close and fasten the baffle of the large feed inlet before operation, to prevent wood chips and fragments from flying out.
- Start the machine and run it idle first. Begin feeding only after stable operation with no abnormal noise, vibration or friction sound.
- Feed logs and branches slowly and evenly through the small inlet, do not force materials in.
- Ensure wood diameter meets machine processing standard. Never feed materials mixed with iron blocks, stones, iron wires, nails and other sundries.
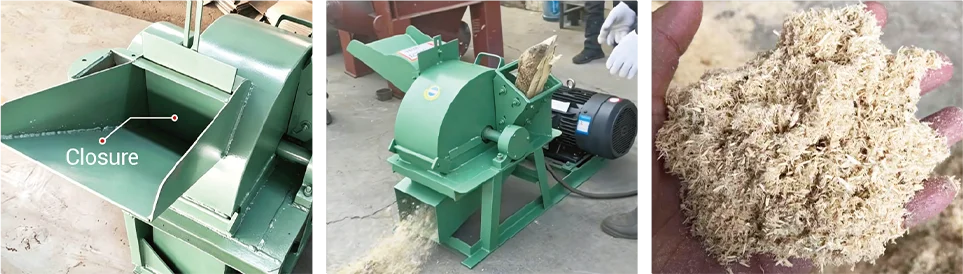
6. Operation Process for Wood Chip & Offcut Crushing
Adopt the large feed inlet to crush short or irregular materials like wood chips, short wood blocks, plate offcuts and wood waste.

- Run the machine idly after startup, start feeding only after stable operation is confirmed.
- Feed materials evenly. Do not dump excessive materials at once to avoid blockage, jamming and motor overload.
- Keep a safe distance from the feed inlet during feeding. Never push materials by hand into the inlet.
- Do not feed materials from two inlets simultaneously to prevent material rebound, debris splashing and excessive machine load.
Stop feeding and shut down the machine immediately for inspection in case of difficult feeding, material rebound, poor discharging, abnormal noise or severe vibration.

IV.Equipment Maintenance
To ensure long-term stable operation of the wood crusher, regularly inspect bearings, blades, hammers, screens, belts, fasteners and protective devices during use.
Bearing Lubrication
Bearings are core components for high-speed operation. Inject butter or lithium-based grease regularly with an oil gun for initial use and daily operation to keep well lubricated.
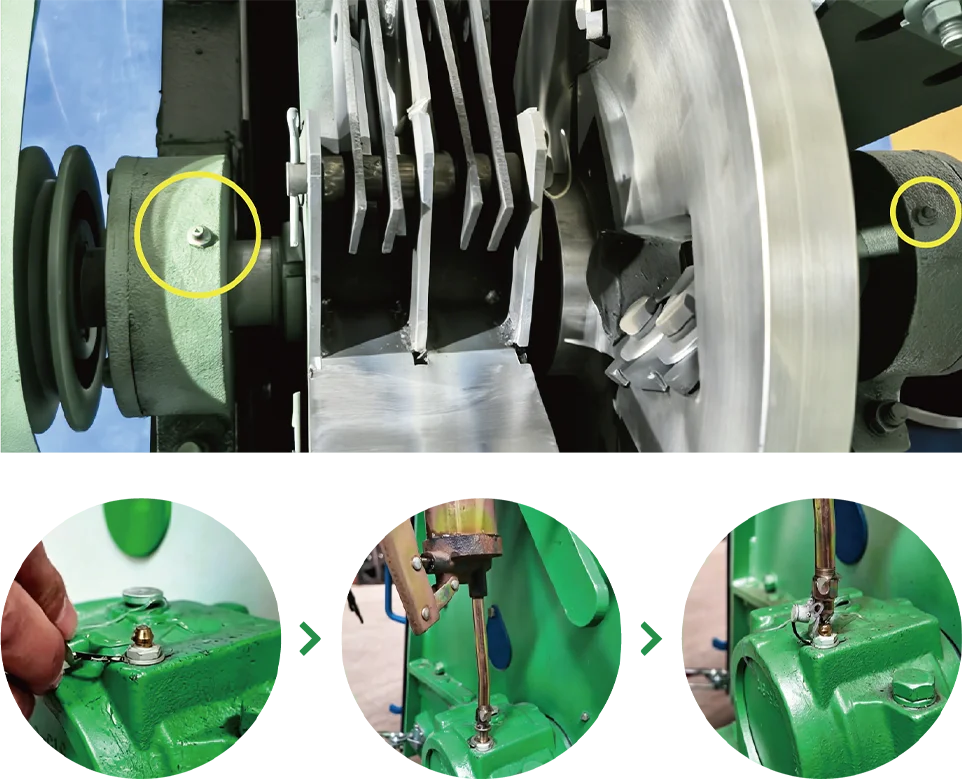
Clean wood chips, dust and dirt around grease nipples before refueling to prevent impurities from entering bearings.
Hammer Blade / Cutter Blade Replacement
All operations must be performed when the machine is completely shut down.
Hammer Blade Replacement
- Remove the fixing pins on both sides of the hammer shaft, take out the shaft, then dismount old hammer blades, sleeves and spacers in order.
- Install new hammer blades in original staggered arrangement, fix their positions with sleeves and spacers. Ensure flexible rotation without jamming, reverse installation or deflection.
- Refit and lock the pins after installation, close the safety guard and tighten bolts.
- Start trial operation, check normal running of hammer blades with no abnormal vibration or noise.
Ensure the same quantity of hammer blades are installed on the cutter disc during replacement. Complete set replacement is recommended.
If the weight deviation between hammer blades exceeds 3 grams, it will cause center of gravity shift, increase machine vibration and even damage bearings and other compo nents.

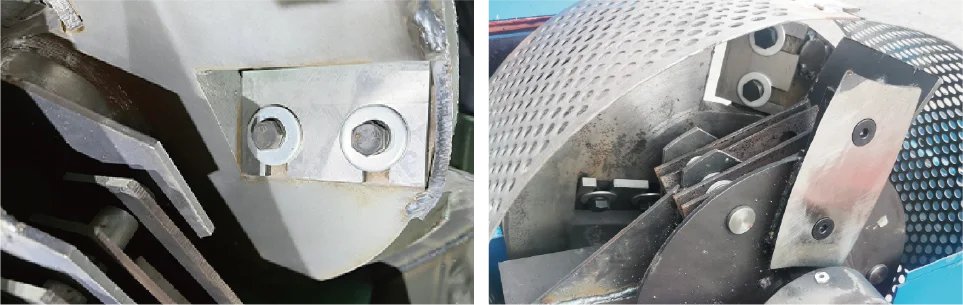
Cutter Blade Replacement
The blades are sharp. Wear gloves to avoid scratches during replacement.
- Loosen blade fixing bolts with proper tools and remove old blades in order.
- Inspect new blades for cracks, notches or deformation before installation, confirm consistent specifications with original ones.
- Install new blades in original direction. Keep cutting edges aligned with machine cutting direction, no reverse installation or deflection allowed.
- Tighten fixing bolts firmly. Ensure blades are tightly fitted without looseness, warping or interference with crushing chamber wall.
- Close safety guard and fasten all fixing bolts after replacement.
- Perform no-load trial run before formal use. Start feeding materials only after no abnormal collision noise, friction sound and obvious vibration are confirmed.
Replace blades in groups as far as possible and keep symmetrical installation positions to avoid unbalanced operation of cutter disc and excessive machine vibration
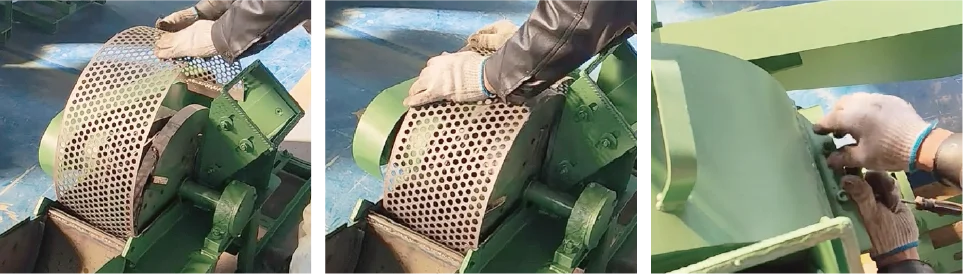
Screen Replacement
- Stop the machine and cut off power before replacement, make sure the equipment is fully stationary.
- Open the protective cover of the crushing chamber and clean out residual wood chips and sundries inside.
- Take out the old screen, check the chamber for blockage, deformation and abnormal wear.
- Place the new screen into the chamber along the arc direction to fit closely with the inner wall.
- Align and clamp the steel plate joints at both ends, ensure no dislocation, warping or looseness.
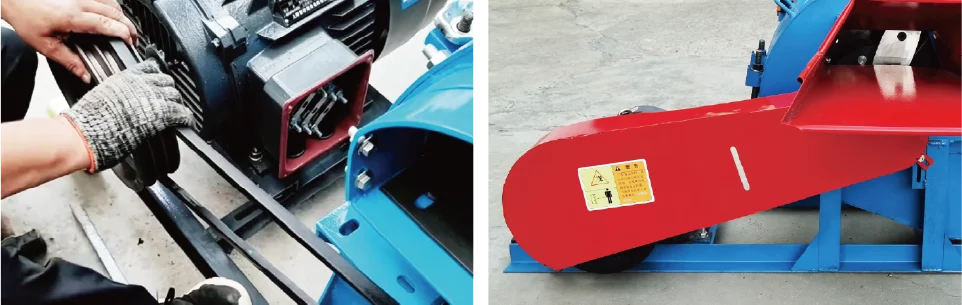
Belt Replacement
- Stop the machine and cut off power, operate only after the equipment comes to a complete stop.
- Open the belt guard, loosen the base bolts of motor or diesel engine, then remove the old belt.
- Take off the old pulley and key block, check shaft end and keyway for wear and deformation.
- Install the new pulley, ensure the key block fits into the slot correctly. Keep the pulley installed flat without shaking. Align the main pulley and power end pulley on the same plane.
- Adjust the position of motor or diesel engine to get proper belt tension, then tighten the base fixing bolts.
- Refit the belt guard and conduct no-load trial run. Put into normal use only when the belt runs stably without jumping, slipping, abnormal noise or obvious overheating.
Regular Maintenance & Inspection
After continuous operation, regularly check bearing lubrication, wear degree of blades and hammers, screen unobstructed condition, belt tightness and firmness of all connecting parts.
Good maintenance habits can reduce machine faults, lower wear parts loss, ensure stable operation and effectively extend the service life of the equipment
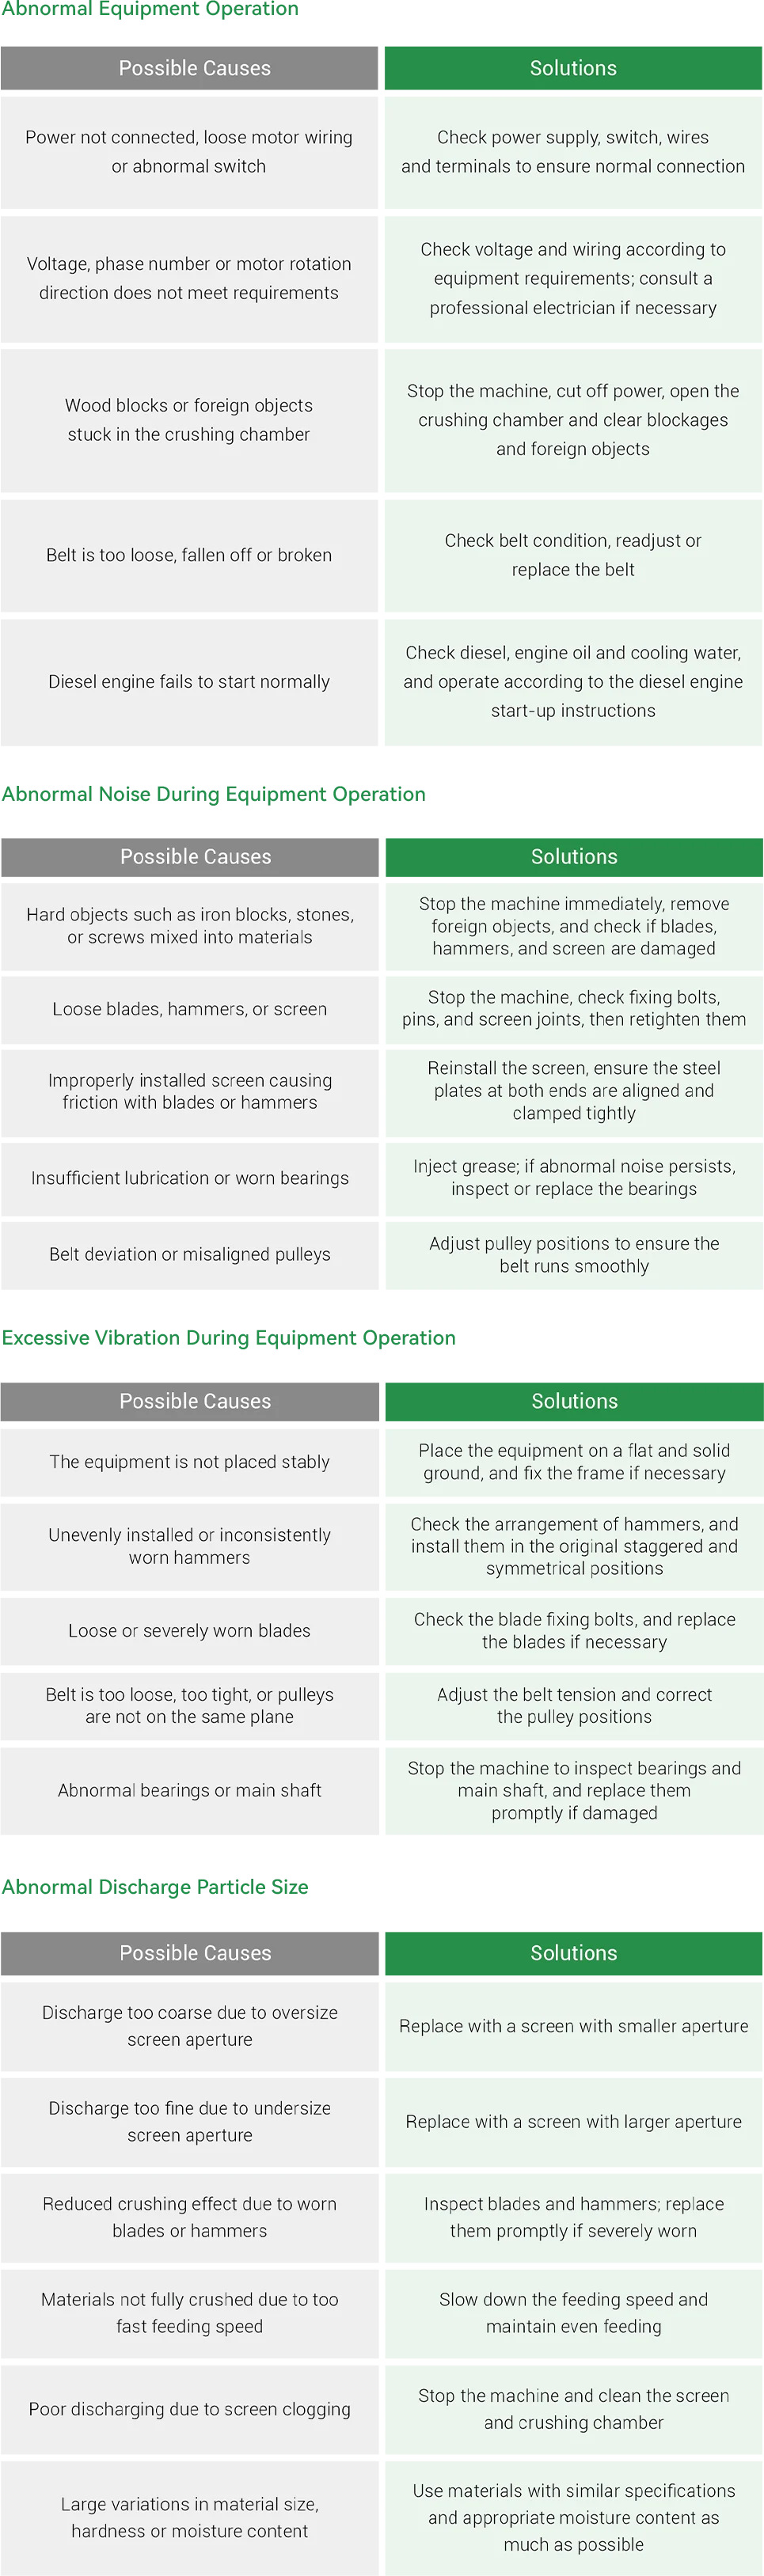
V.Common Faults and Solutions

Need Some Help?
Contact us quickly and we will reply you within 24 hours. We will not disclose your information.